Thursday, April 10, 2008
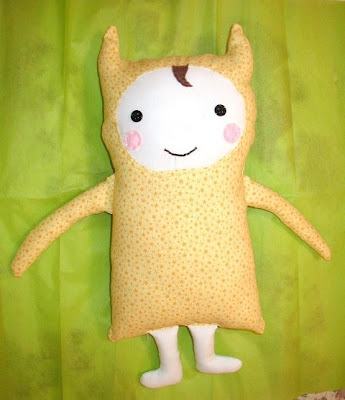
I swear I was subscribed to all of my sisters blogs but somehow I missed the last four posts of Annie Caries! One of which is showcasing the adorable monster dolls she designed and made for all the boy cousins for Christmas. The yellow one is the one that my little boy got, and he LOVES it. He hugs it more than any other toy. It reminded me of the boy in "Where The Wild Things Are" and I found out that that's what she used as inspiration for it. I actually never got to see the other monsters because Our family wasn't there last Christmas so I was so excited to finally see the other critters she had made. Check out her blog for more of the cute crafts shes been up to.
Thursday, April 3, 2008
I did say monday would be when these two prints were coming to my Little Lola's shop, but what the heck, Thursday is better than never. Someday I will learn never to give specific deadlines for myself, since I always end up procrastinating or give myself too little lime to accomplish it. Enough with my silly banter, here are my two promised prints! These are specially unique prints because the originals are not going to be available for purchase. I had a special spring time feeling in my subconscious when I painted them, they both have pretty landscape surroundings, and that makes me smile. Happy Thursday!
Wednesday, April 2, 2008
Little Lola's Featured!
Check it out Little Lola's was featured today. :)
Serra, who lives right here in Logan, featured my shop on her blog.
Tuesday, April 1, 2008
Paper decoration tutorial
I wanted to try my hand at making Martha's paper bag project from scratch. (Using book pages not paper bags.) And I thought I'd share my little adventure with you! You can make these with any kind of pretty paper that pleases you. These would make great party decorations so keep these in mind next time a birthday comes around.
The supplies you need are,
- 6 or 8 sheets of paper (I used 8 old book pages)
- double sided sticky tape
- scissors
- hole punch
- string
Fold each paper to create the paper bag-like fold in the sides. Tape the seam into place. Make 8 of these.
Punch a hole in the bottom of each one and cut the tops into a petal shape.
Tape them all together placing a piece of tape just above each hole.
Thread a string through all of them, then tie a knot. Not too tight though, so it can fan out later.
Leave a good length of string on the end so you can hang it up when your done.
Last, put tape on the top one and attach it to the back one. The middle ones will fan out nicely.
Hang it up and there you go! Feel free to ask any questions.
Saturday, March 29, 2008
Update finaly here.
Seven lovelys are up in the shop!
There just wasn't enough time to get all of them up during nap-time, it took way longer that I had anticipated. But I did persevere an get 7 new items up today! There were two that didn't make it up so maybe round two will be coming someday. Happy browsing! and have a great weekend!
Little Lola Doll, in Vintage Yellow Dress
My Pet Blue Bird, Original papier mache, and paperclay sculpture
Friday, March 28, 2008
Songs of the heart
Thursday, March 27, 2008
New Lovelies
Subscribe to:
Posts (Atom)
-
I am so excited to share with you the EASY instructions on how to make this felt glittered tree. I really am super happy with the way the...
-
I want to start by welcoming all the readers that have come over from Made , where this post is participating in "Celebrate the boy...
-
Remember this post where I bought these ? Well I finaly made some, and boy are they GOOOOD! They are so delicate and crispy! Very rich, too...