Showing posts with label crafts I make. Show all posts

Friday, October 25, 2024

I’m here!

    Hello there, I have been meaning to post more often here on the old blog. I have been taking a break from all things social media and feel have found myself again! Social media is a blessing and a curse, when you misuse it or have the wrong mindset, it can be harmful to your mental health. Basically I was seeing what others were doing and I felt like I should be doing that too and  if I would try and then feel unsatisfied because it wasn't really what I wanted. I felt like I was late all the time and too pressured and in a hurry. But now that I've had a break I feel incredibly whole and I'm excited to share what I've been doing. 
    Lately I have been into papier-mâché sculpture again :) those of you who have followed along in the beginning of this blog remember that papier-mache has been a staple in my life. I am happy to be at it again. 
paper mache witch, art doll, folk art, witch sitting on a pumpkin
paper mache sculpture, folk art , art doll, witch with a cauldron

I made these witches a few years ago but this blog didn't get the update so I thought I needed to share her here. :)
Another fun project I'm working on with my husband is Frost Hollow Farm ! We are both so passionate about beautiful old architecture and immersive whimsical art, so were beginning a new project on our 7 acre abandoned dairy farm, where were building an old world Dickensian downtown and creating a theme park with shops and hand made life size sculpted whimsical shop owners and all the details of their fantastical world. 


I am in the process of creating a shop to feature my cartoony style specifically, it'll feature printable downloads, coloring books, stickers, journals and merch in that same style. Much of it will be featuring the cat named Sebastian and his many friend who seem frequents that art style of mine. I call it Sebastian and Friends. :) when I have it all put together ill announce the launch.


Thanks so much four joining me on this fun update post!


Tuesday, October 25, 2022

Making cute things again

Hi everyone, I'm excited to update you with some art I have been making this year
These cartoon-y animal characters are such a blast to create, I really have found a happy place in creating them!
More Halloween characters coming soon!
I have been showing my wares at the local gardeners market this year and I have enjoyed it so much! It great meeting people who are passionate about cute art, and making new friendships. I am sure to do it again next year!


Saturday, December 5, 2020

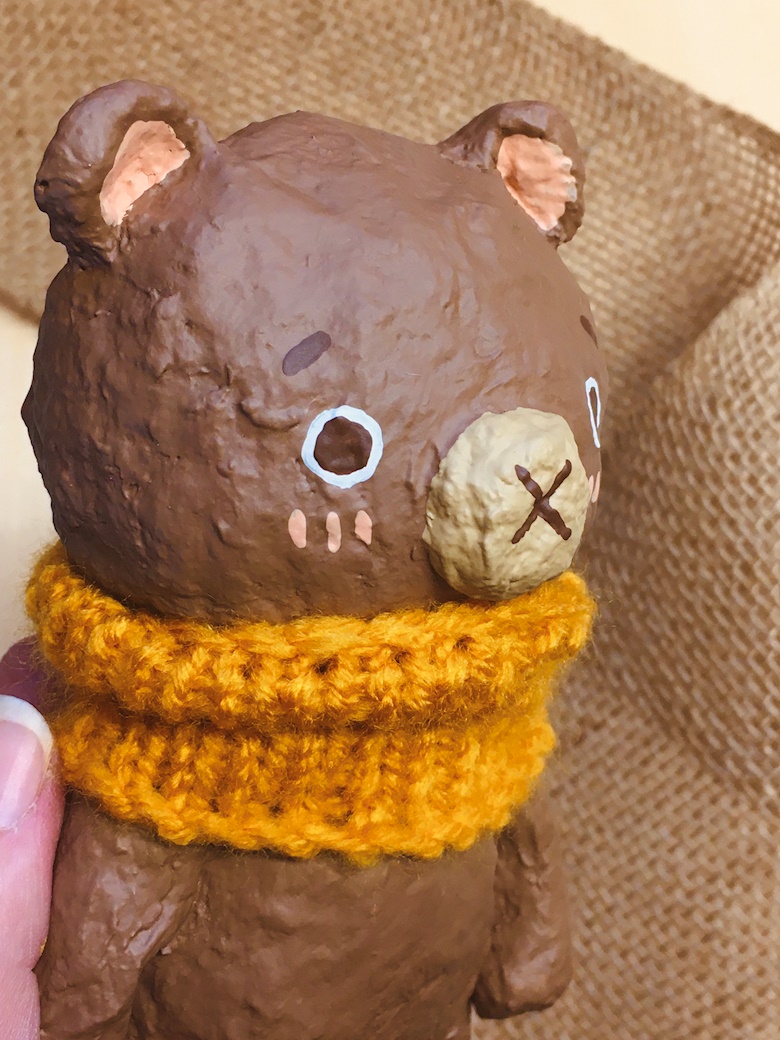
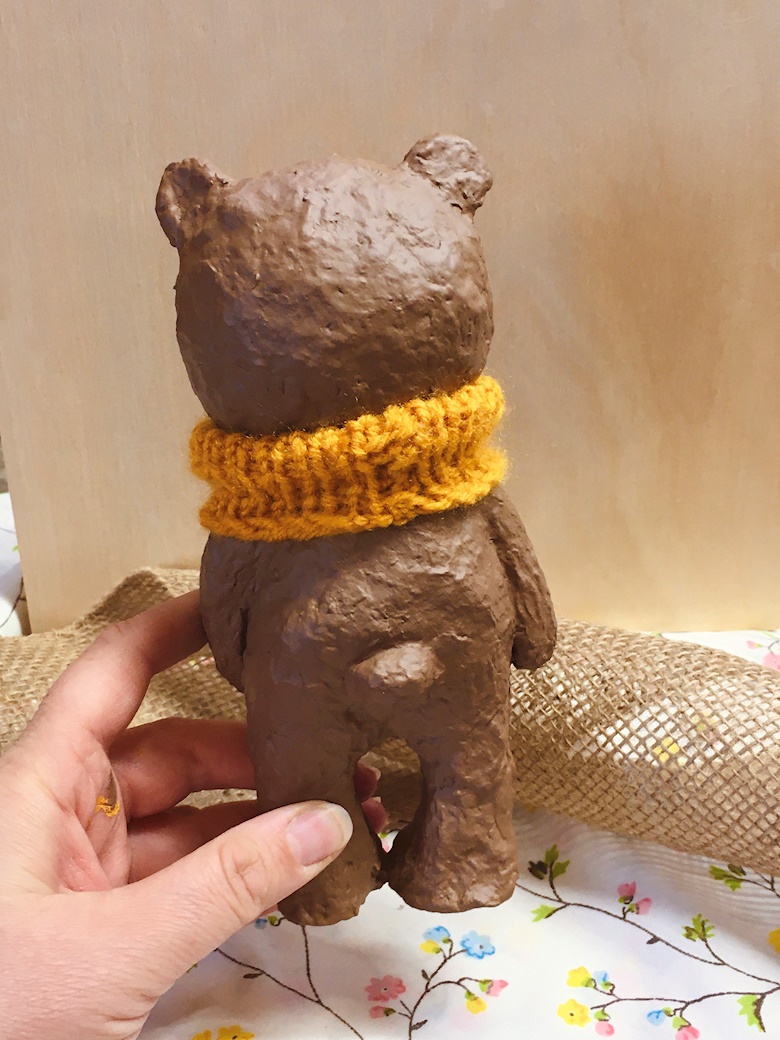
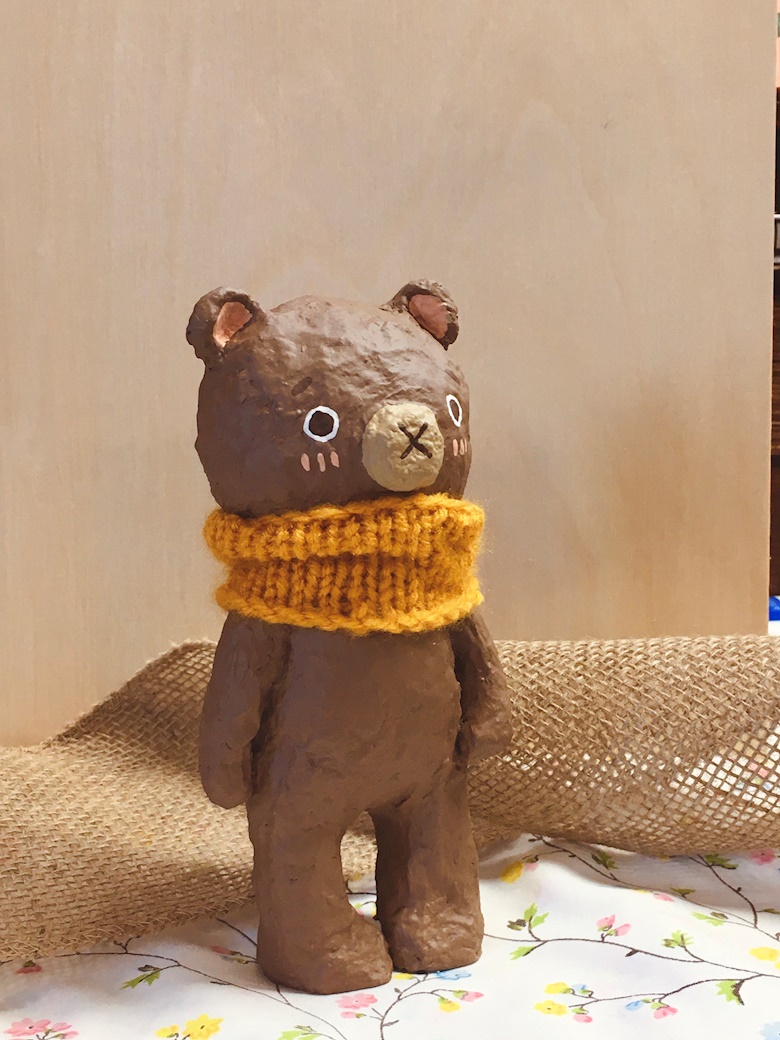
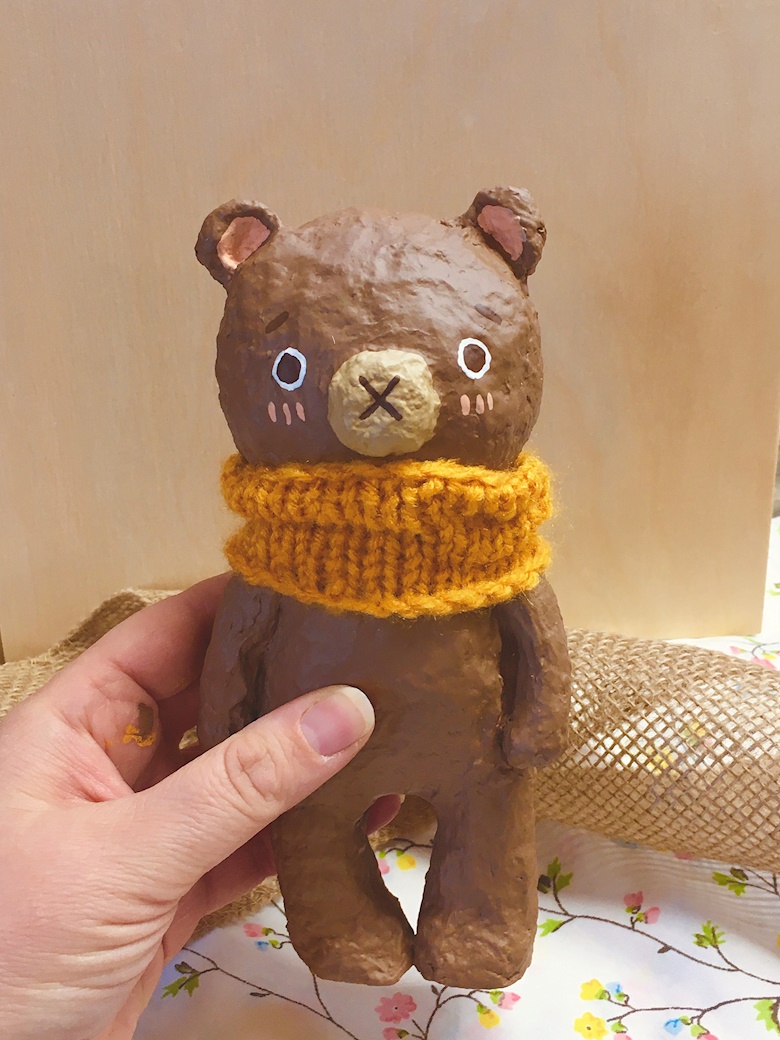
Benny Bear! Paper mache sculpted figurine!


This is Benny, my cute little bear OC (original character) and he's all cuddled up in his golden yellow hand knit cowl scarf! ^^ He is hand made by me with my homemade paper mache clay recipe! I love working with paper clay because of the rustic looking aesthetic but also because it is made from recycled newspapers!! I love his adorable little face!! ^﹏^ He would be the perfect addition to your office space or desk area.
 

Thursday, January 24, 2019

Morgan, a new papier mache witch sculpture

(Note: I use amazon affiliate links in my articles. )

Witches aren't just for fall :) Sometimes  Halloween is for all year. What are your thoughts are you a Halloween fan? I cant say enough how much fun  it has been getting back into sculpting again. Paper mache is so much a part of my artistic outlet.

I never thought that having no artistic outlet would hurt me, but I have had time where I was emotionally suffering because I didn't have a voice or a vehicle to express myself. I am so glad to be at it again.  :) Also it is totally OK to let yourself take a break when you need one, sometimes you need different outlets and different times. but never rob yourself of an outlet you are craving. There is time, there are so many ways to create, just go out and do it! :)
Have you ever taken a break from your art or outlet, and ended up right back again because it was an innate part of you? let me know in the comments.
If you want to see whats available you can visit my Etsy shop by clicking HERE. :)


Tuesday, May 8, 2012

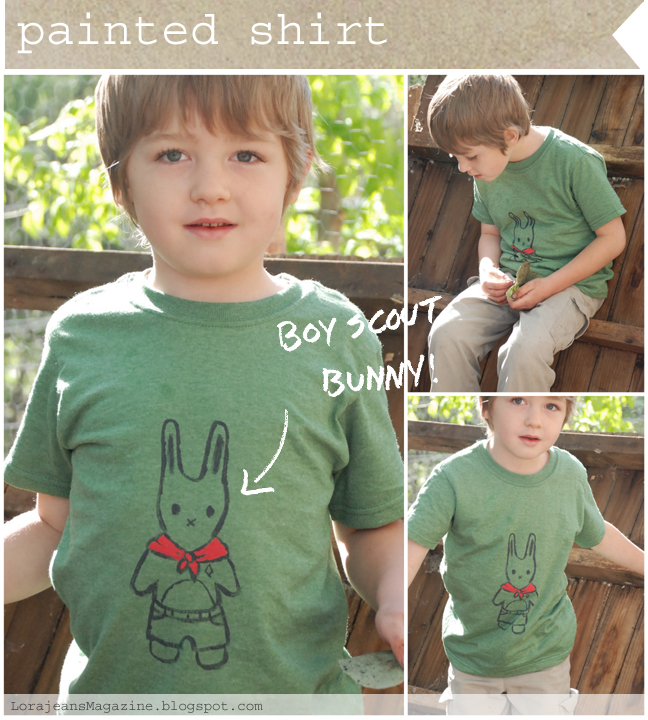
freehand painted t-shirt

Here is a pic i had in my drafts file and its so fun to see i had a style foe painting my animals even back then! :)( This was a draft post from 2011)
Wednesday, February 15, 2012

relaxed Valentines party

 We had a few friends over for a fun little Valentines party. We made cards, decorated felt flags, ate cookies, and danced to vintage records. :) It was really laid back party. I basically sat and chatted with all the moms while the kids went at it. I loved seeing what the kids made with what I put out, they got really creative! It turned out fun, and the relaxed feel was really nice. You know, with me being eight months pregnant that was all I had energy for anyway. My sis Mer  had come into town for the weekend and helped me get things ready. She was super awesome and made the cookies because I was running behind with party prep. They were so yummy thanks Mer!!
Pin It


Friday, January 20, 2012

no sew applique shirt


A few weeks ago I made Lizzy an shirt with a girls face on it. I really love how it turned out! I did some sewing to make the eyes nose and mouth but no sewing at all to attach it to the shirt!
 It's ironed on!
 
Trent took the nice camera ( a Nikon D-80 if you're curious) with him today, to take photos for paintings, so the kid's digital camera will have to do for today.  I actually really like how the photos look with this camera. (I did have to warm them up a bit in Photoshop though.)

 I am for sure going to post about how I did it as soon as I get some quality time with the nice camera. 

Saturday, December 31, 2011

Featured in Molly Makes


A few months a go I was asked if my crochet nesting cups could be featured in the January issue of Molly Makes magazine. It was the first I'd heard of the magazine because it is published in the UK but once I saw a little of what they were all about I was totally on board! Serious eye candy!! :) Even though its just a little blurb it is still super exciting!!

If you are interested you can subscribe to Mollie Makes through this link: 
and download the iPad version here:
http://goo.gl/qzprk


Friday, December 23, 2011

Christmas cookies


I baked cookies all day yesterday and folded origami boxes all day today and here is the result.

We're planning on going caroling tonight and these are the treat boxes we're giving away. I made 13 boxes and each box has 13 goodies inside! I guess 13 is a lucky number as long as cookies are involved! I made Chocolate Peppermint Marshmallow Bark, raspberry and orange jam filled Thumbprints, and our family's favorite cookies, Chocolate Dipped Orange Logs! I am over on Dana's blog today sharing the recipe for chocolate dipped orange logs so go check it out!

Saturday, November 26, 2011

saltdough cookie ornament in origami box

 Just wanted to post a link to my salt dough cookie ornament recipe for those who don't already know about it yet. These are sill some of my most favorite ornaments. And don't forget the origami box with a window to put them in.

Tuesday, November 8, 2011

my christmas mantle


So we put up our Christmas trees this past weekend but I have a confession, we decorated our mantle the day after Halloween! :) :) The felt trees are from my glittered felt Christmas tree tutorial that I posted last year. I'm thinking of making more in different sizes and covering the entire mantle with them. I don't know if I really will, the silver pots and candle sticks are usually a permanent mantle decoration. What do you think?

Monday, October 31, 2011

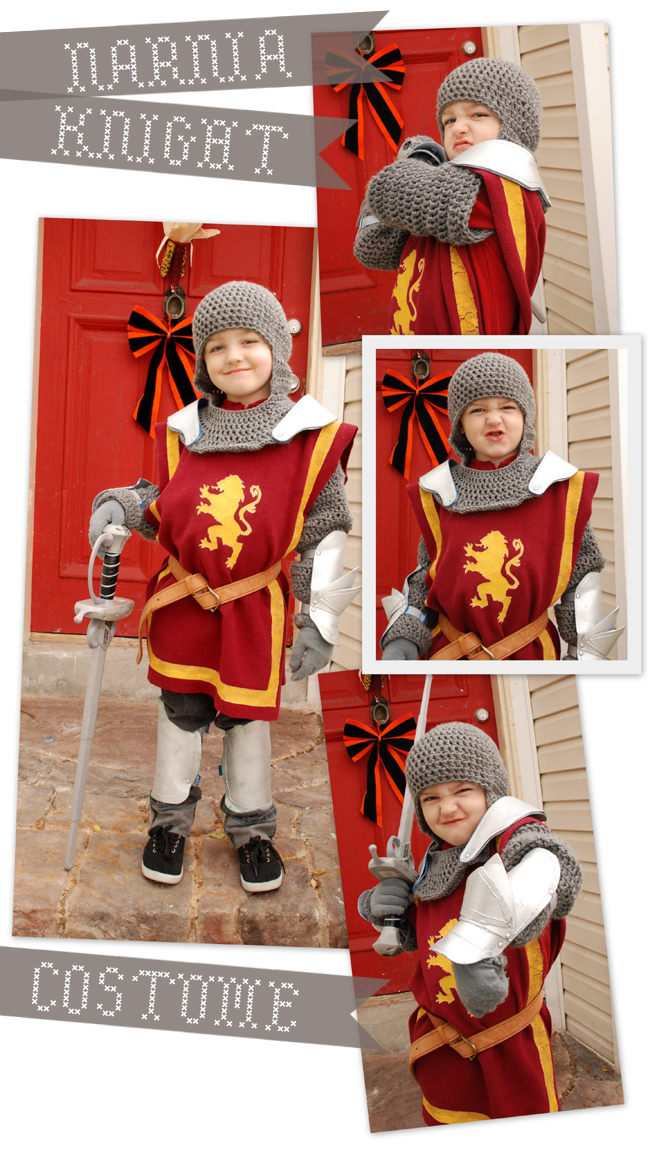
knight costume

I finished the knight costume and I have to say it turned out awesome!! Alex loves it! I cut the tunic out of fleece and did a freezer paper stencil of a similar dragon to the one they have in the Narnia movies. I used masking tape as a stencil for the gold border. As you already know I crocheted the "chain-mail" hood & you can find the pattern I made right here. Later I crocheted tubes so he could have chain-mail on his arms also. After seeing this tutorial, I made craft foam armor for his arms, legs, and shoulders. I used silver spray paint but probably would use regular craft paint next time because the spray paint rubs off easily. He absolutely loves it, can you tell? :)

Saturday, October 29, 2011

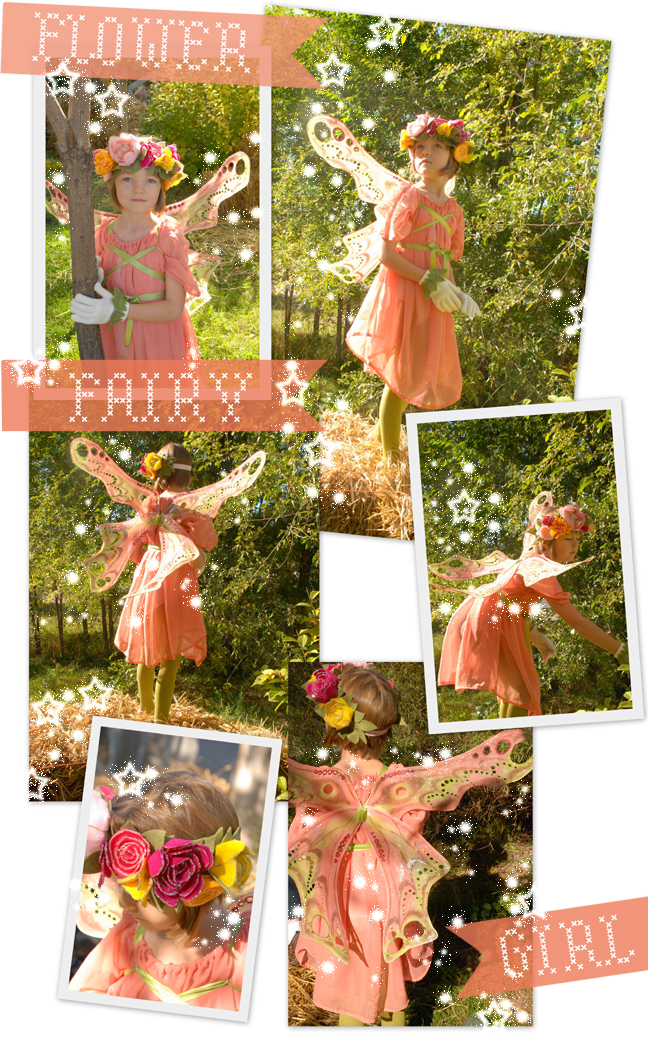
fairy costume

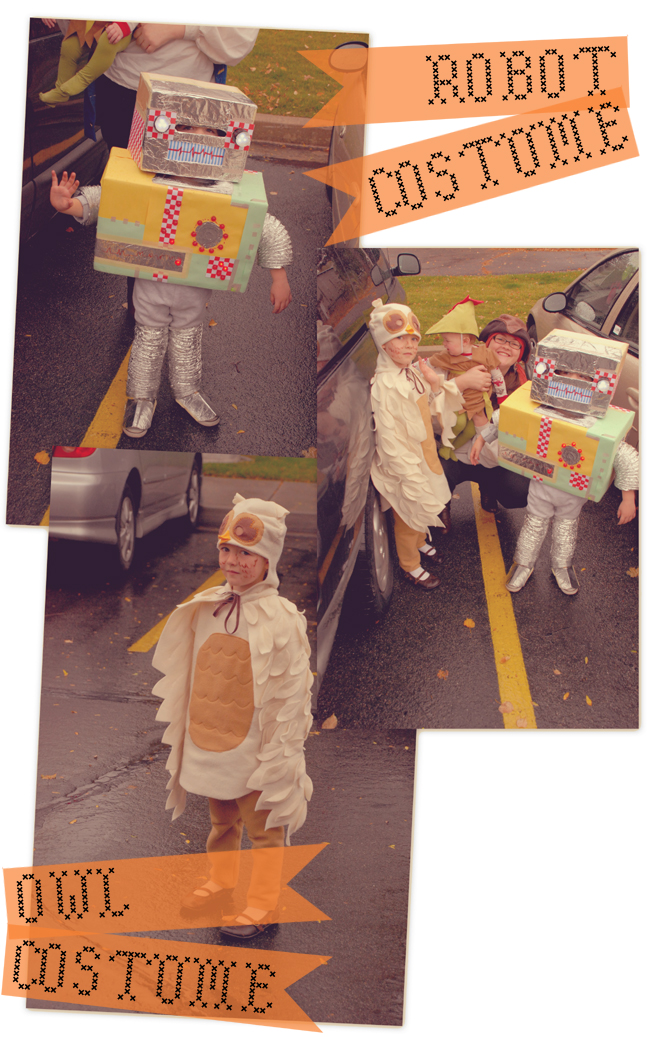
Here is the finished fairy costume I made for Lizzy. I am so happy with how it came together and so is she!! Her request was that it was a "wow" costume. Last year she said everyone said wow to her brothers fully lit robot costume and never noticed the owl standing next to him, and I am sad to say she was right. Even a hand made adorable owl doesn't get the "wow" when there's an awesome robot with blinking lights.  So, as you can see, I went all out for her costume trying to make sure it was a "wow" costume.  I think the entire outfit as a whole comes together and creates the wow but if I had to choose the piece that adds the finishing touch it has to be the felt flower crown / head piece.  It has glitter all over each flower and adds a goddess feel to the entire costume. the dresses is just a simple chiffon rectangle with a hole in the top and sides for her head and arms. The head hole was cut extra big and has elastic in it to gather is together and give it a Grecian feel. It would still look like a bag if it weren't for the long ribbons that tie on the wings, they criss cross over her chest gathering the dress in and making it look more finished and pretty. She wears a leotard and tights under the dress for modestly since chiffon is sheer, but the costume is made to be able to wear a long sleeve top and leggings underneath to keep her warm. I made gloves so that on Halloween night she wouldn't freeze her little fairy fingers off. They're just dollar bin gloves from Joe-Annes. I cut out leaf shapes from felt and glittered them, then simply hot glued them onto the wrist to make a bracelet effect. the wings I made after seeing this how to video on you tube. I loved the idea of burning holes into the nylons to make the wings seem more fragile and petite. After I shaped the wigs and put on the base coat of pink and green paint, I had my Trent help me with the hole burning and painting the brown vein accents. Thanks honey! :) I then finished the look by glittering and gluing jewels all over the place.
When it was done she wore it to a fall festival trick or treat at the gardeners market and got tons of audible "wows", I think my job here is done!

Wednesday, October 26, 2011

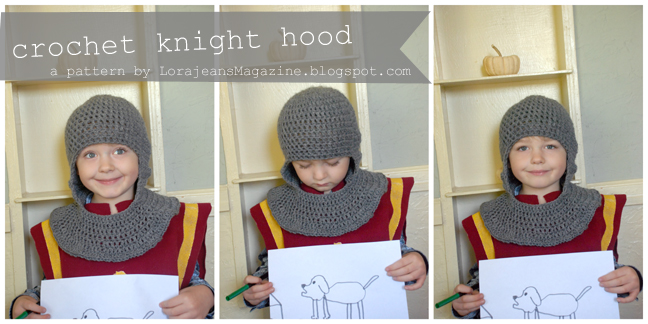
Free pattern: Crochet knight hood

As promised I am giving the instructions on how to crochet the knight hood / hat I posted about last week. (he was so proud of his dog picture and having him hold it was the only way he would pose for a photo :) he said "it looks just like a  real dog!") 
Check out his full finished knight ccostume here

Yarn: Red heart worsted 4
Hook: USK 10.5 / 6.5mm

Here is a key for all the abbreviations I use.
dc = double crochet
ch = chain
sl st = slip stitch
rep = repeat
sk = skip
beg = beginning
rnd = round


Ch 4, join with a sl st to form a ring.

Rnd 1: ch 2 for first dc, 12 dc in ring, sl st to top of beg ch. 
(13 stitches counting the ch 2.)

Rnd 2: ch 2 for first dc, 2 dc into every dc, sl st to top of beg ch. 

Rnd 3: ch 2 for first dc, 3 dc into every other dc, sl st to top of beg ch.

Rnd 4: ch 2 for first dc, dc in 1 dc, *2 dc in 1 dc, dc in next 2 dc, rep from *, sl st to top of beg ch. 

Rnd 5: ch 2 for first dc, dc in each dc, sl st to top of beg ch. 

Repeat rnd 5 nine more times (or till edge of hat reaches eyebrows)

(Now you are going to make the face opening by only stitching the back and sides.)

Row A: ch 2 for first dc, dc in each dc for 35 stitches, (flip work around to start next row on top of the stitches you just finished).

Repeat row A five more times back and forth with 36 stitches each row counting the ch2.

At the end of the 5th row don't ch2 and flip work around. Ch 18 & sl st to top of beg ch to begin stitching in rounds again and create the collar.

Collar rnd 1: ch 2 for first dc, dc in each dc and all 18 ch st, sl st to top of beg ch.

Collar rnd 3: repeat collar rnd 1

Collar rnd 4: repeat collar rnd 1

Collar rnd 5: repeat collar rnd 1

Collar rnd 6: ch 2 for first dc, dc in 1 dc, *2 dc in 1 dc, dc in next 2 dc, rep from *, sl st to top of beg ch. 

Repeat rnd 6 three more times, fasten off and thread extra yarn into the hat. 
You're done!
Let me know if you have any questions. :) I'll be posting the full finished costumes soon!

Thursday, October 20, 2011

making costumes

 I have been having more fun making costumes this year than any other year for sure! My oldest son is being a knight and my daughter is being a flower fairy.  When my son said he wanted to be a knight I knew right a way that I wanted crochet some chain-mail armor. The pattern I made is simple and if I don't procrastinate I'll post the pattern here on my blog before Halloween. When my daughter said she wanted to be a fairy I was super excited! I LOVE fairies! She showed me this fairy from our fairy book illustrated by Cicely Mary Barker and I was smitten! I changed the leaf hat to a flower wreath / crown because I knew it would be fun to make it out of glittered felt flowers. I used my flower tutorial as well as some other tutorials like this one, and this one, and i made up some new little ones for more variety.
There is so much more to the two costumes than the head pieces but I'll share it all after I'm finished with everything.

Wednesday, October 5, 2011

Last years costumes


I just realized that I never posted pictures of the costumes I made for the kids last year. It was probably because I finally finished them on Halloween day. There was a robot with real lights, a pretty little owl and baby robin hood. I cant wait to get working on this years costumes. If only they would make up their minds. :)
What costumes are you making this year?

Monday, September 19, 2011

Into the halloween spirit!

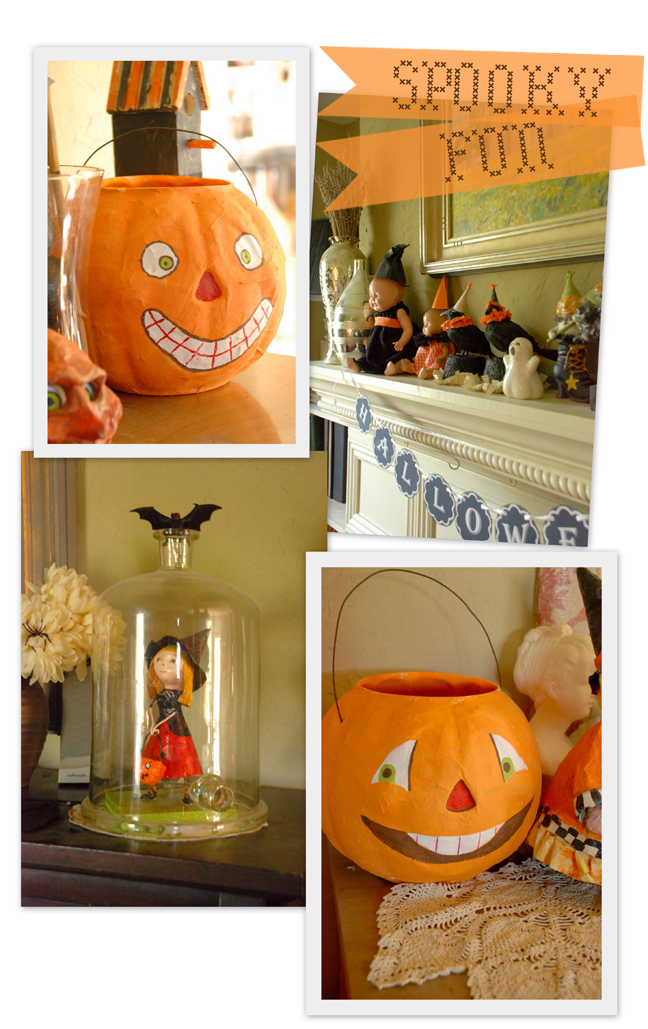
I have to tell you all the secret I have been keeping... I'm pregnant!! I am about three months along now and we're so happy! This is one of the reasons I have not been blogging much. I just feel so blah! (The other reason being that I am now homeschooling two kids instead of one and it takes most of my time up.) I have to say that Halloween has me crafting again though!! Trent and I just finished painting the two vintage inspired pumpkin treat buckets last night!  We really love how they turned out!! September is totally a Halloween month for us! Wanna see our Halloweens past? Take a look here, here, and here!

Thursday, June 30, 2011

Another quilt top finished! { and a pattern of sorts }

Remember the bunting slash pendant quilt from these other posts? Well I finished piecing it! I am so happy with how it turned out!!
I chose a primary color theme and decided to do a mix of traditional and modern fabrics. I love that it is simple and each fabric is showcased by the white surrounding it.
Let me tell you a little about it in case you want to make one too.
  • Each triangle measures 5x8x8 in.
  • There are 96 colored triangles and 102 white muslin triangles.
  • Sew the 8 inch sides of the triangles together alternating between colored and white.
  •  Make 6 sections (or strips) of 17 white triangles and 16 colored ones. 
  • Each triangle section/strip begins and ends with a white triangle.
  • The 5 strips of muslin between the triangle sections are 9 in. x 70in.
  • The top and bottom strips of white muslin are 4.5 in. x 70in.
I'll be sure to share the finished product all bound and quilted! :)
I honestly can't believe I made a quilt by myself!! I always said that of all the crafts, quilting was the one I would never be able to do. But I figured it out pretty good I think. It really turned out better than I thought, I figured all the tips would get sewn into the seams but somehow they didn't!
I also remember saying once that quilting was a stupid craft because you take perfectly good pieces of fabric and cut them up just so you can put them back together again. Well, people change and I take it all back! Quilting ROCKS!!!!!! :) And I hope to keep making more and more!

On a  completely different note,  we found a baby robin that fell out of its nest today. 
 I heard it crying while I was outside taking photos of the quilt. It's so adorable an tiny! We fed it half a worm and them put it back in the nest. It seems the parents had no problem with us handling it and are taking care of it again. :)

Tuesday, June 14, 2011

quilt top

I finished my very first quilt top! My amazing quilting sister helped me a lot! Thanks Annie Carie! It's a little lap quilt made from long pre-cut fabric she bought for me as a birthday gift. I can't remember the name of the fabric line but I know it is sold at Jo-Ann's. :)


I really love the color scheme. I actually just bought similar colored ginghams and dots at the thrift store. Maybe another quilt? :) 
Were having a rough time over here with my husband busy getting ready for an art competition and baby boy being sick. He finally kept solid food down right before bed. Curse that church nursery class! He has only been in nursery for three weeks and he got hit with those nasty germs pretty hard! :( We'll pull through. I'm confident the worst is over.

Hope you all have a happy week full of happiness and health.

Monday, June 13, 2011

striped baby tunic

I am a little late for Dana's boy clothes week, but I still wanted to share the little striped tunic I made for my youngest. I made up the pattern as I went but it 's basically this ,and this combined.
 I used and old orange t-shirt and a blue (super faded) baby blanket I had saved for making kids clothes.